A View from the cellar
A crash course in cellarmanship, Part III – Venting and Tapping
In this ongoing series I hope to broaden knowledge about real ale, its history, practice and relevance. The first two parts were about the history and use of casks. Part 3 is about venting (spiling) and tapping.
3-4 days before you want to drink your cask, move it to a cold room (outside in winter works well) and set it up on a stillage (a rack which holds the cask on its side) and leave it for a day. This will allow the yeast etc. to settle out at the bottom of the cask. Stillage usually holds the cask level at first, but as the beer level gets lower it needs “chocking” or “stooping” where back of the cask is raised slightly to get as much beer as possible out. The reason casks aren’t stooped from the start is that, when full, beer would rest against the shive and the pressurised gas would be at the end of the cask, so when venting there would be a loss (and a mess).
The next step is to vent the cask. Many people use a hard spile (peg) to punch the hole in the centre of the shive, but this is quite bad practise as it can get stuck in the shive hole, re-sealing it and perhaps requiring the spile to be snapped off. It’s best to use a punch. I’ve used a few other fun tools, like an engine valve, but the easiest is a screwdriver with interchangeable heads (with no head in use) and a mallet. But be careful! Have a soft and a hard spile standing by as you need to get it in the shive hole quickly, put it in with your hand and push it in finger tight. Which spile to use is a divisive issue; I suggest that if you need to serve the cask quickly or if the cask is not very “lively” then use a soft spile.
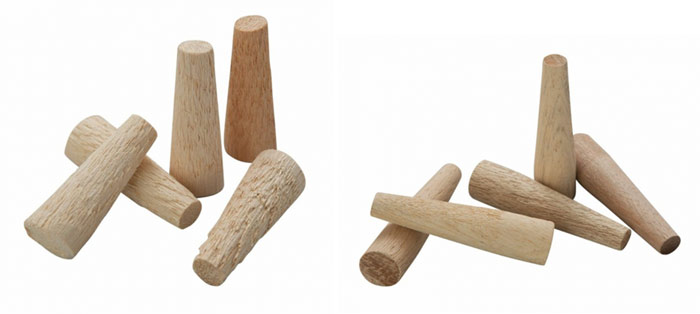
The soft spile is very porous and will allow excess CO2 to escape, allowing the pressure to drop rapidly. As soon as foaming from the soft spile dies down, remove it and replace with a hard spile. If the cask is “lively”, using a soft spile will allow the CO2 to be relieved. There will also be foam and beer escaping, so in most circumstances I would suggest using a hard spile; these are still slightly porous and will allow the CO2 to be released, but it will take longer and not stir up the sediment as much. There will be some fizzing from the end of the spile; wait for this to stop before tapping. A cloth or bar-towel on the top will help if it’s leaking a bit. If the cask has calmed down somewhat then remove the spile briefly to check that it has (or if the spile was just blocked with yeast/ hops) and quickly replace.
Now it’s time to tap. Remember that this should ideally happen at least a day before you drink it: doing it all on the day of means you’ll probably have a foamy cloudy beer instead of a perfect pint. Don’t worry about it going flat; as long as you keep it cool and “sealed” with a hard spile it’ll be fine. Grasp the tap—making sure it is CLOSED—near the actual tap part (everyone instinctively grabs it by the shaft, but this is wrong as they find out quickly). As the shaft enters the keystone, your wrist will hit the cask rim and cause you pain; this is OK. Similarly, be careful with the mallet, as bruised fingers aren’t fun either. Try to get the tap in one swift motion squarely into the keystone. Always use a wood mallet or ideally a dead-blow hammer; a regular metal hammer will damage the tap, and a rubber mallet will bounce and much of the force will be lost.
Consider not serving the cask for another hour or two until it settles down. Forethought really helps; more than once I’ve prepared by setting up casks and tapping them at 3am so they are properly settled for a noon festival.
At this point, do not move the cask at all. Do not lift it or shake it, no matter how gently you think you can do it; If you do, it will get the sediment swirled up and all the patience of setting it up properly will have been wasted. If you want, pour a little beer out from the tap to relieve the pressure. It may have a little cloudiness to it, but if you’ve done everything else right it should be fine. Give it the taste test and look for the clarity: would you be happy to be served this beer?
If the spile is still in tight, the beer will quickly stop pouring and the only way for air to get in is bubbling through the tap. That is NOT what you want; this will oxidise your beer quickly and disturb the sediment.
When it’s time to serve, remove the hard spile and replace it with a soft spile or just loosely set the hard spile in the hole (make sure it doesn’t fall or get sucked back in and seal it up). If you’re going to blow through the cask in a few hours, you can take out the spile completely and leave it open. If you’re going to take a break for more than an hour or 2 then hard-spile it firmly until you’re ready to come back.
Once the cask is open it will start going flat, especially if it is in a warm environment. There’s a natural CO2 “blanket” that covers the beer, but as the cask gets to half full the surface area is at its highest and therefore most at risk. Your biggest enemy is ambient warmth; this is what makes the beer lose carbonation and flavour. Keep the cask as cool as possible, perhaps in a tray of ice or have a wet cloth over the top.
There are generally 2 types of cask taps: gravity taps, and beer-engine taps. A gravity tap angles the beer downward so that it can fill a glass directly using a loose tap which is easily turned on and off. Engine taps have an open end the size of a hose pipe and are designed to be connected to a beer engine line (however a simple L-shaped steel tube can be screwed into place creating the down-turn for glass filling). Engine taps often have quite a stiff feel because they generally don’t need to be turned on and off frequently, although they can be loosened using the bolt beneath.
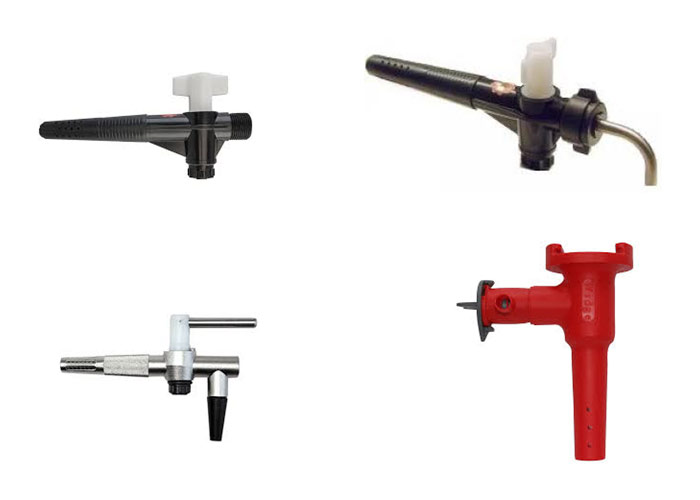
I use 2-headed cask taps that create a ‘T’ shape; that way, one end can connect to the engine and the other can be used to fill growlers using a down-turn and tube. Most are plastic and have a shelf life of a few years, but if you invest in a steel one you’ll have decades of happy tapping!
There’s also a system called the “widge” or “cask widget” which uses a floating line that goes into the cask, which is kept on end like a keg. These work well but can leave a lot of beer behind. I could write a whole article about these widges, but if you’re curious you can research them yourself or buy me a beer and ask.
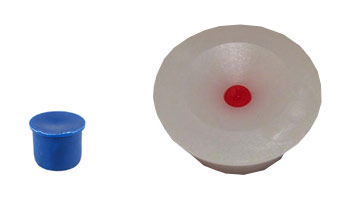
When a cask is empty, remove the tap and pour away as much of the lees (sediment) as you can, rinse both tap and cask if possible, then seal up the cask with tape. Better still, use a cork (clip-cork) to seal the keystone, and a “tut” to seal the shive. You can use a spile to seal the shive, but it can get knocked off or have to be broken to take the shive out.
Either way, make sure the cask is sealed ASAP so that it doesn’t get stinky, gross and attract flies. Most brewers have horror stories of casks that were returned unclean.
Next month we will look at beer engines and serving technique.
Skype has established its website-based client beta to the entire world, after establishing it extensively from the Usa and U.K.
earlier this calendar month. Skype for Internet also now works with Linux and Chromebook for immediate text messaging communication (no video and voice but, these call for a
plug-in installing).
The increase in the beta provides assist for an extended listing of languages to
aid reinforce that global user friendliness